Campfire Cooking: The Best Camping Equipment, Recipes & Tips
This website may contain affiliate links and we may be compensated (at no cost to you!).
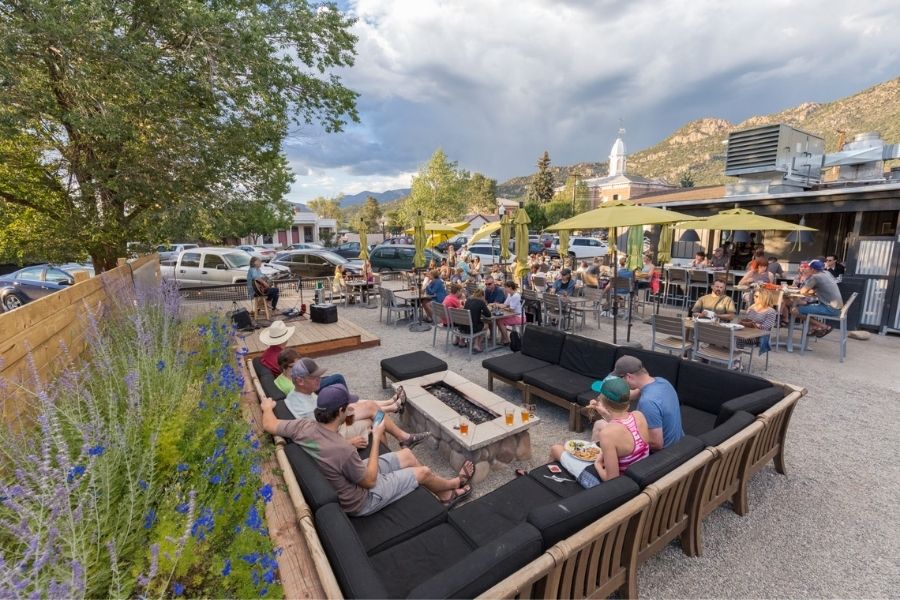
Campfire cooking often brings back childhood memories, when life was simpler and we would sleep under the stars.
For myself and my family we’ve always kept it simple.
When we go on camping trips, we bring ingredients and equipment that is easy to pack and easy to prepare.
All you need is a campfire or a portable grill and you’re set!
And I’m not just talking about eating hot dogs, beans out of a can and s’mores (although those things do hold a nostalgic place in my heart!).
As a Colorado chef, I’ve realized there are more creative and fun ways to prepare food while campfire cooking.
The Best Camping Equipment for Cooking
When trying to cook while camping there are a few pieces of equipment you can use to make your cooking experience quick and easy.
Plus, they are inexpensive to can even have multiple uses!
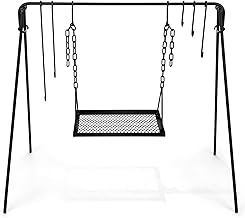
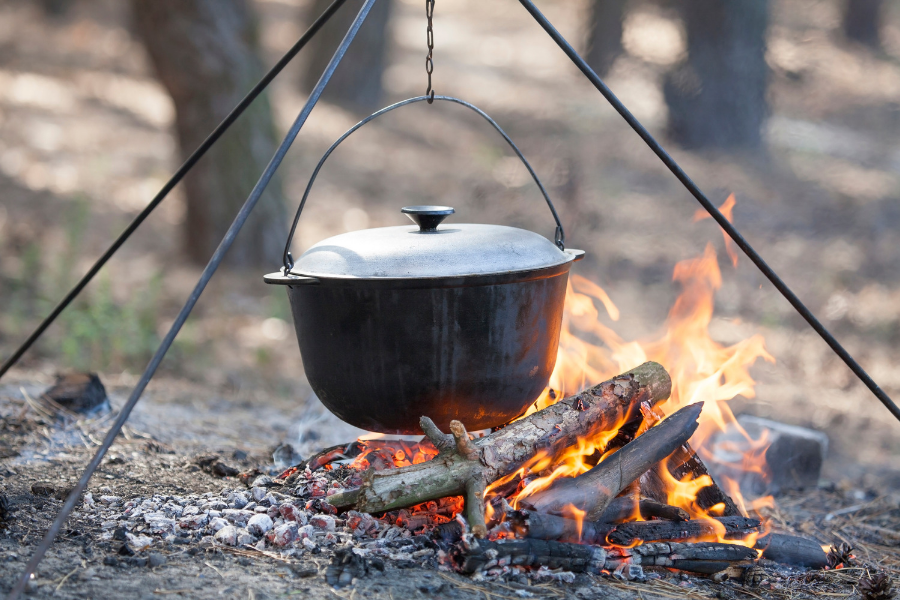
Campfire tripod stand
Campfire tripod stands are super sturdy metal tripods that can site directly over an open flame and hold a ton of weight.
This makes it easy to bowl water, make soup, or cook anything on top of your fire without needing a grill or grate.
You can also find three heavy, straight, large branches, and create a DIY cooking tripod.
Just make sure the tripod legs are tall enough to avoid being licked by the flames.


Pie Iron with steel and wood handles
A pie iron is a great multi-purpose tool while camping. It can be used like a sandwich iron or to cook just about anything.
Thanks to the long steel and wood handles, you can hold it over a fire without getting burned.
And it’s enclosed inside 2 hot pans which causes food to cook very quickly.


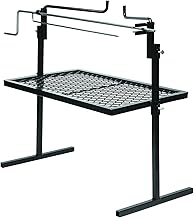
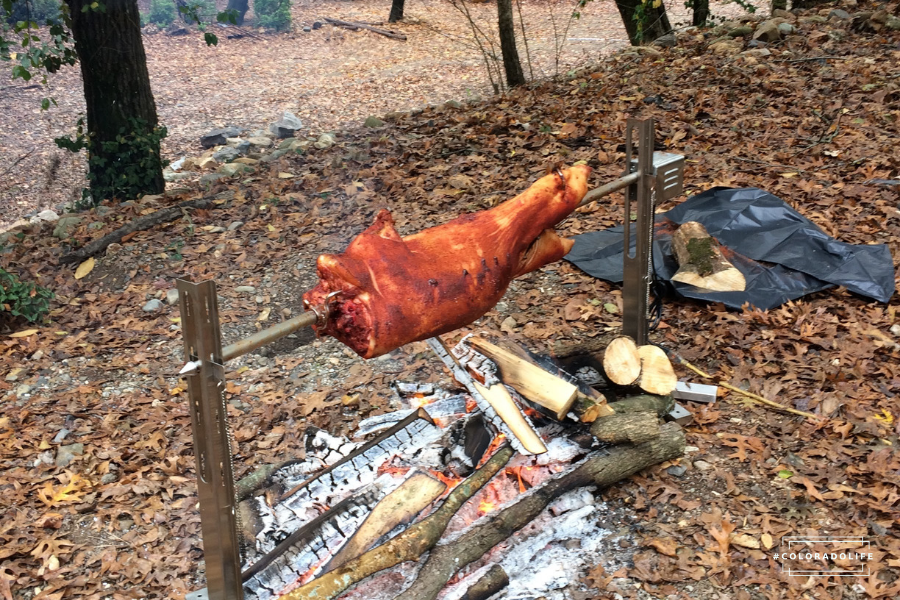
Rotisserie grill and spit
A grill or spit is my go-to method for cooking right over the fire. Cooking over the fire means your food will get a nice smoky taste, while using it like a stove top.
They do make electric self rotating spits but doing just old fashioned is the way I always go.


Portable folding campfire grill
This is a simple grill rack that can be flattened for transport and then put directly over a flame for cooking.
This makes campfire cooking super easy for nearly any cooking technique.
It’s also an all around incredibly versatile tool to have.


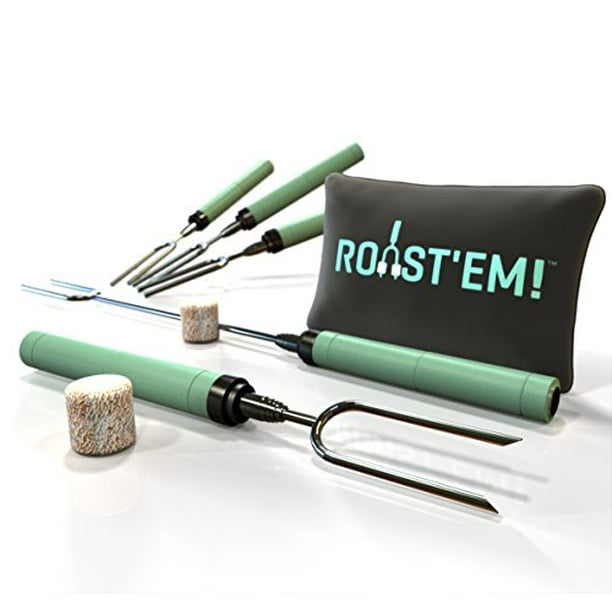
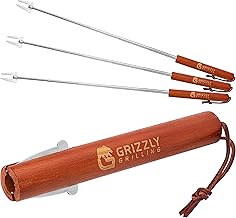
Telescoping campfire roasting sticks or forks
Roasting sticks or campfire forks are super useful and probably the most fun form of cooking possible. But boy is it useful.
Attach your ingredients to the end of the stick and hold it over the fire to cook.
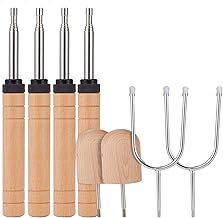
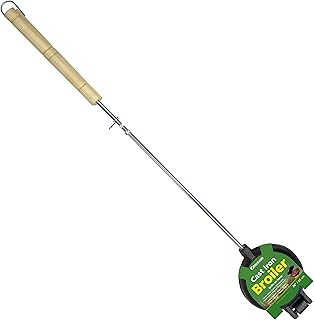
Grill broiler basket
Similar to the long-handled Pie Iron, a grill broiler basket is super useful for food you don’t mind being licked by flame.
It too has long arms to be held over the fire, and is great for cooking meat, fish and vegetables.


Cast iron dutch oven
Dutch ovens are amazing! They are a tool I would suggest that anyone who is an avid camper, or simply enjoys cooking, should buy.
A Dutch oven works similar to a traditional oven where they can contain, distribute, and regulate heat more evenly, especially when compared to a regular pot.
This makes it very useful when cooking over a campfire where you cannot precisely control the temperature.


Top Campfire Cooking Methods
There are a variety of quick and easy ways to cook food over a campfire. Each main cooking method depends on your food choices.
Choosing the right ingredients to take with you on a camping trip is just as important as the method in which you cook it.
You want to keep things simple, remember?! No one wants to be washing dishes out in the woods all day.
Here are some tried-and-true campfire cooking methods when outdoors or RVing.
Roast over an open flame
Sometimes the simplest campfire cooking methods are just roasting your food over an open flame.
Ingredients like hot dogs, sausage, and vegetables can be cooked very easily using roasting sticks or skewers.
If it can be stuck on a skewer or stick, you can roast it over an open flame.
Wrap and bake in foil
While camping, aluminum foil is going to be your best friend. It allows you to put things directly in your campfire without getting your food covered in ash or wood particles.
You don’t need any sort of cooking pot either, as the aluminum foil packets can be placed directly in the fire pit, which makes clean up a breeze.
Plus, it can be folded into just about any shape.
Fish, chicken, vegetables and sauces can all be placed inside an aluminum foil packet and cooked together all at once.
Grill or barbecue
Grilling or barbecuing when camping is a longstanding tradition, and with good reason.
Who doesn’t love to eat smoky bacon or charred vegetables?
You can simply bring a portable grate to put over your fire (more on that in the cooking equipment section below).
Or bring a portable camping grill that runs off of propane.
Cook your ingredients directly on the grill, or use skewers or cedar planks, for adding extra flavor.
Cast iron cooking
Cast iron cooking gives you a lot of options for flavor, for only one type of cooking method.
There are cast iron pans, dutch ovens, and even cast iron sandwich makers and waffle irons.
And the best part is that a cast iron pan or pot can go directly on the open flames.
They are easy to clean and can impart a lot of flavor into your food.
9 Yummy Campfire Cooking Recipes
Here are nine yummy but super simple outdoor recipes using the campfire cooking methods methods mentioned above.
1. Seven ingredient pasta
⇨ Prep Time: 10 min
✓ Cook Time: 10 min
⛉ Serves: 2
⛢ Method: cast iron
△ Equipment: portable campfire grill, tripod stand
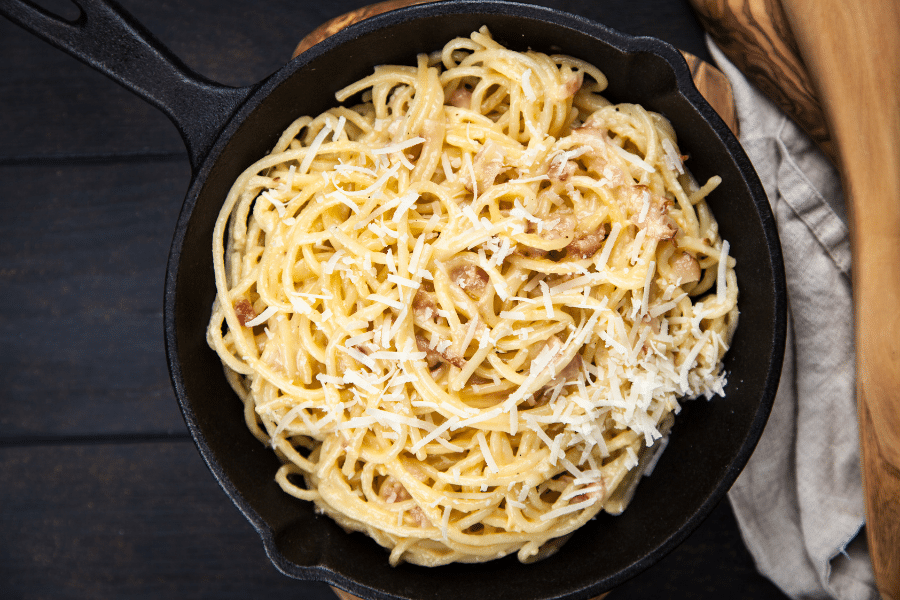
Pasta is often quick and easy to cook, and this recipe contains only 6 ingredients in total.
You can pre-cook the pasta at home, or boil some water over the fire and cook as directed on the pasta package.
I prefer to cook the pasta at home and then put it in a Tupperware with about a cup of the starchy water that the pasta was cooked in.
This keeps the noodles moist (and we’ll need the starchy water for this recipe anyway).
Ingredients:
- ½ lb of spaghetti
- ¼ cup good quality olive oil
- 10 cloves of garlic
- ⅛ cup of water the spaghetti was cooked in
- ⅔ cup of chopped parsley
- ¼ tsp red pepper flakes
- (optional) ¼ cup Parmesan cheese
- (optional) Lemon juice
- Salt and pepper
1: Cook spaghetti pasta until “al dente”. Note: Reserve some of the starchy water the pasta was cooked in.
2: Peel and slice garlic or mince finely.
3: Pick leaves of parsley from the larger stems and chop to get some finely minced parsley.
4: Add olive oil to a saute pan over medium heat. When oil is shimmering, add garlic and reduce heat to low and cook while stirring.
If using minced garlic, cook for about 2 minutes until garlic is golden. If using sliced garlic, cook for about 4-5 minutes until golden brown.
5: Stir in red pepper flakes (the more you add, the spicier this dish will be). Add the pasta and the reserved pasta water.
The water is crucial as the starch in it will bind and make for more of a sauce-type consistency!
6: Remove from heat. Stir in parsley, lemon (optional), Parmesan (optional) and salt and/or pepper to taste. Serve immediately in bowls and enjoy.
2. Loco Moco with potatoes
⇨ Prep Time: 10 min
✓ Cook Time: 25 min
⛉ Serves: 2
⛢ Method: cast iron, open flame
△ Equipment: portable campfire grill

“Loco Moco” is a Hawiian dish and was a favorite meal of mine when I was living in Hawaii.
Traditionally, Loco Moco is a hamburger patty over white rice with store-bought brown gravy and fried egg(s).
But there are many different variations with fish, pork, chicken, sausage — or my preferred meat Spam (another Hawaii staple).
When cooking over a campfire, we can make this a bit easier and more rustic by substituting potatoes instead of rice.
Ingredients:
- 1 large Russet potato
- 1 can of Spam
- A package of brown gravy
- 2 large eggs
- Few tbsp of oil
- Kosher salt
- Sriracha (optional)
1: Dice potato into small cubes. Add 2 tbsp of cooking oil to the cast iron pan until hot. Add potatoes and then saute over medium heat.
Lightly salt potatoes while cooking. Continue stirring every few minutes until you start getting a nice golden crust over potatoes — it will be about 10-15 minutes in total. Set aside.
2: Cut Spam into ½ inch slices and add them to the pan with potatoes over medium heat. Cook each side of the Spam until it gets a nice sear, or about 3 minutes on each side.
3: In small pot, make gravy following directions on the package. Keep warm.
4: Add 2 tbsp of oil to saute or cast iron pan. Add both eggs and salt. Cook eggs over medium heat until the whites nearest the yolk are completely white.
One way you can speed this up is to put a lid on the pan! Continue cooking until your yolks are nice and runny, or about about 2-3 minutes.
5: Add potatoes to a bowl or all into the same pan, cover with gravy and add slices of Spam. Finally, top it off with your nice runny sunny side-up eggs.
Add hot sauce, like Sriracha, if desired.
Alternative: you could also stay more traditional to the Loco Moco recipe and serve this dish with rice. But cooking rice over an open flame, or bring along a rice cooker is not always easy or simple.
However, you can cook the rice beforehand and bring it with you to the campground!
3. Fire baked potato
⇨ Prep Time: 5 min
✓ Cook Time: 30-60 min
⛉ Serves: 1
⛢ Method: Aluminum foil, open flame
△ Equipment: none
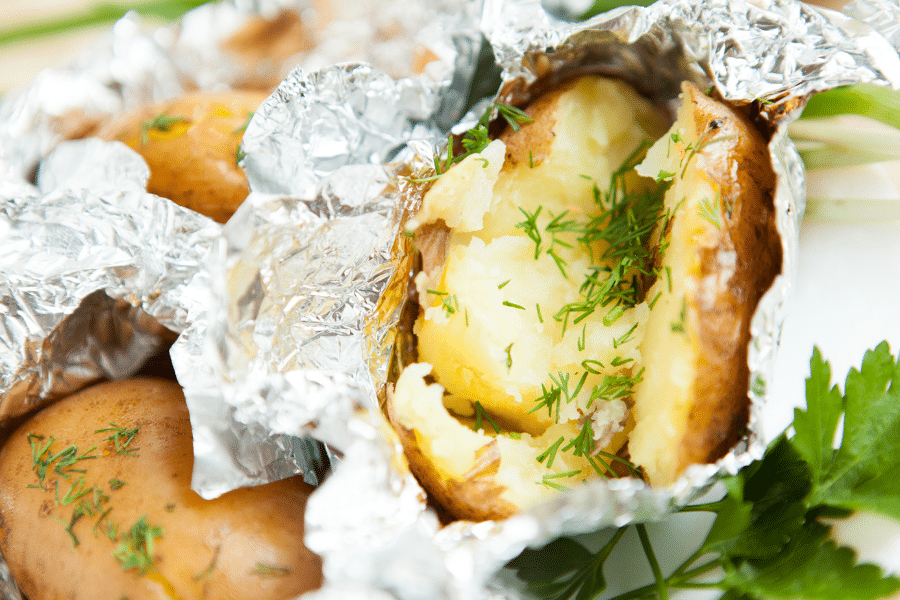
Potatoes are inexpensive, easy to store, and simple to cook which makes them a great option for campfire cooking.
Plus, the toppings you can add are seemingly endless, no matter how many picky eaters you have in your family.
Ingredients:
- 1 large russet potato
- Olive oil
- Kosher salt
- Additional toppings (chili, cheese, butter, sour cream, etc)
1: Using something sharp, like a knife or fork, stab the outside skin of the potato at least 10 times.
2: Cover the potato with olive oil and salt outside skin liberally (the holes previously made will allow the salt to penetrate the skin).
3: Double wrap the potato in aluminum foil.
4: Bury the potato in the hot coals for 30-60 minutes (the hotter the fire is the less time it will take to cook). Check as needed until cooked thoroughly.
5: Add your toppings and enjoy.
4. Fish in foil
⇨ Prep Time: 10 min
✓Cook Time: 20-30 min
⛉ Makes: 10-12 cakes
⛢ Method: Aluminum foil, grill
△ Equipment: portable campfire grill, pie iron, grill broiler basket
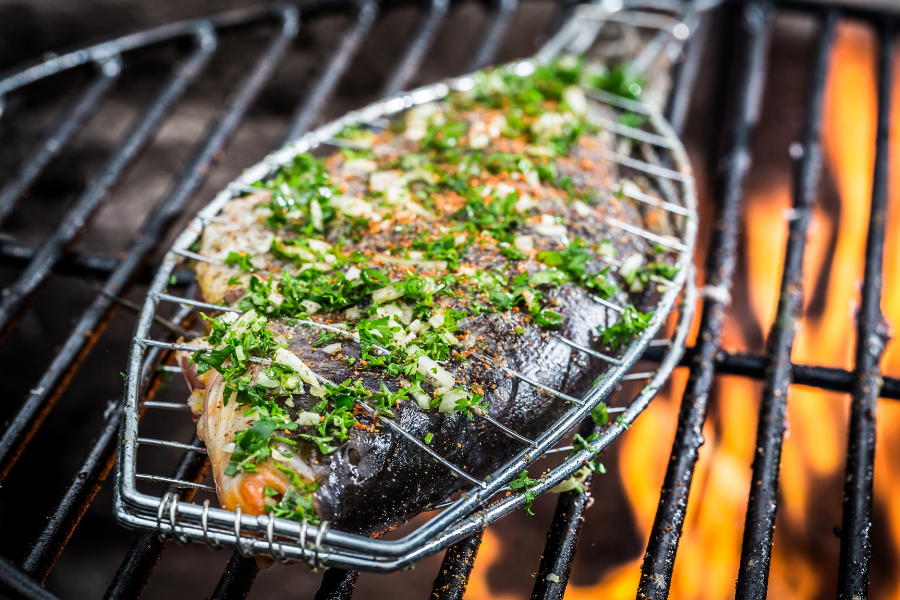
Cooking fish while camping is a right of passage for any young kid. I enjoy cooking this recipe using fish I’ve caught while camping (trout is my jam!).
However, this can also be done with any store bought fish.
Ingredients:
- A fillet of fish (or whole from the stream you caught it from)
- A lemon cut into slices
- 1 tbsp oil or butter
- 1 tbsp or 2 stems of soft herbs (parsley, tarragon, thyme, basil)
- Salt and pepper to taste
1: Take a whole fish, or a fillet, and season all sides generously with salt and pepper. Place in the center of the aluminum foil.
2: Place lemon or orange slices on top of the fish. Add herbs, then drizzle with olive oil or place a few squares of butter spread evenly.
3: Fold the foil over the fish and crimp edges to get a good seal.
4: Cook on top of a hot rock that has been in the fire for about an hour. Continue cooking until the flesh of fish is opaque — or about 15-30 minutes depending on the size of fish and heat of the fire.
Alternative: You can also skip the aluminum foil method and roast the fish directly on a grill.
5. Dutch oven pizza
⇨ Prep Time: 15 mins
✓ Cook Time: 16-18 mins
⛉ Serves: 3-4
⛢ Method: cast iron, open flame
△ Equipment: dutch oven
Pizza is a very versatile dish for both kids and adults because you can add any kind of ingredients to your liking. (I like pineapple on mine!)
Pizza dough is relatively easy to find at any grocery store. You can also buy flatbread or biscuits to create individual pizzas.
And you will need a few dry ingredients to help with rolling out the dough while camping.
Ingredients:
- 8-10 oz pizza dough
- ½ cup of flour and cornmeal
- Parchment paper
- Meat and vegetable toppings of your choice
1: Prepare the area where you are going to put the dutch oven in the fire. You can either place the dutch oven to cook the pizza next to the fire or directly on top of the coals.
2: Cover the lid with hot coals as well. Let the dutch oven get super hot — like 450 degrees. Depending on how hot the fire is, the pizza should take about 10-20 minutes to cook.
Note: If you are placing the dutch oven near the fire, you will still want to have the coals on the lid to get as hot as possible.
You will also have to do a lot of rotating to make sure everything heats as evenly as possible during the cooking process.
3: Roll out the pizza dough on cutting board dusted with flour. Use something large and round like a water bottle or wine bottle. Roll it as large as the bottom of the dutch oven.
4: Put few tbsp of cornmeal on the parchment paper. Place flattened dough on parchment paper and stab the pizza dough with a fork a few times to prevent bubbles.
5: Use whatever toppings and sauces you want, on top of the dough.
6: Carefully take the dutch oven lid off and place the pizza with toppings and parchment paper on bottom of oven.
Place lid back on top (with more coals) and put dutch oven back over coals. Cook for 16-18 minutes or until golden brown crust.
6. Campfire bacon or sausage
⇨ Prep Time: 10 min
✓ Cook Time: 15-25 min
⛉ Makes: 10-12 cakes
⛢ Method: open flame, grill
△ Equipment: campfire roasting sticks or forks
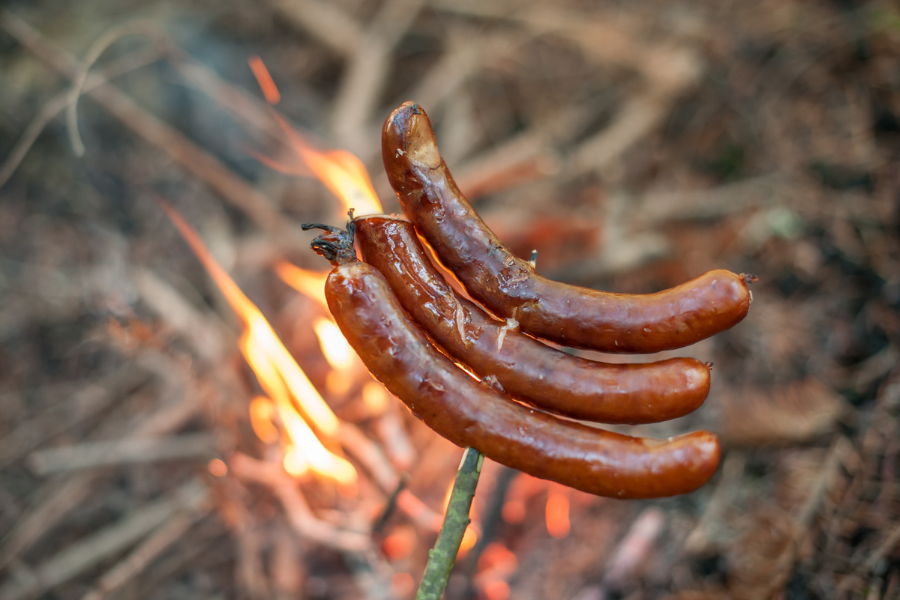
I love cooking bacon or sausage over an open fire! The smoke adds a delicious flavor and you can use the drippings as oil for cooking other food.
Besides, who doesn’t love the feeling of cooking meat on a stick over an open flame? Who knows.
Maybe it makes me feel primal or something. Me man, me cook on hot fire. Me eat meat. Grunt.
Ingredients:
- Thick-cut bacon
- Sausage
1: Use a sharp stick, or a roasting fork, to ribbon the bacon onto the sticks like skewers. Try to avoid rolling it up too much as you want to allow the bacon to cook evenly.
2: Cook meat above the open fire, careful not to let the flames lick the bacon or sausage too much. Roast for about 10-15 minutes until your desired level of crispness is reached.
Alternative: You can also cook the bacon or sausage on a grill using aluminum foil (and save the drippings) or in a cast iron pan to capture the bacon grease.
7. Super simple quesadilla
⇨ Prep Time: 5 min
✓ Cook Time: 5-10 min
⛉ Serves: 1
⛢ Method: Aluminum foil, cast iron
△ Equipment: Waffle iron, pie iron

This is also a kid-friendly but easy camping recipe. Kids and adults alike can pick and choose what ingredients they want on their quesadilla.
You can prepare all of the ingredients ahead of time by creating individual foil packages and then throwing them on top of a grill, or even directly on the fire.
Alternative: When we camp, we don’t like to bring too many things that need to be refrigerated. Consider buying canned chicken or canned vegetables.
Ingredients:
- 1 large tortilla
- Cheese (the more the better in my opinion)
- Vegetables — grilled onions, peppers, spinach, tomatoes, corn
- Meat — bacon, chicken, etc.
- Beans
- Salt and herbs
1: Cut a large piece of aluminum foil and place tortilla in center.
2: Place cheese on half of the tortilla and add any additional ingredients on top of the cheese.
3: Fold other half of tortilla over the filling and cover with foil and closing it tightly. Crimp edges so unwanted contaminants won’t make their way into your food.
4: Cook for 5ish minutes or until the cheese is nice and melted. Avoid any intense flames so as not to burn the quesadilla.
8. Four ingredient S’mores
⇨ Prep Time: 5 min
✓ Cook Time: 5 min
⛉ Serves: 1
⛢ Method: open flame
△ Equipment: campfire roasting sticks or forks
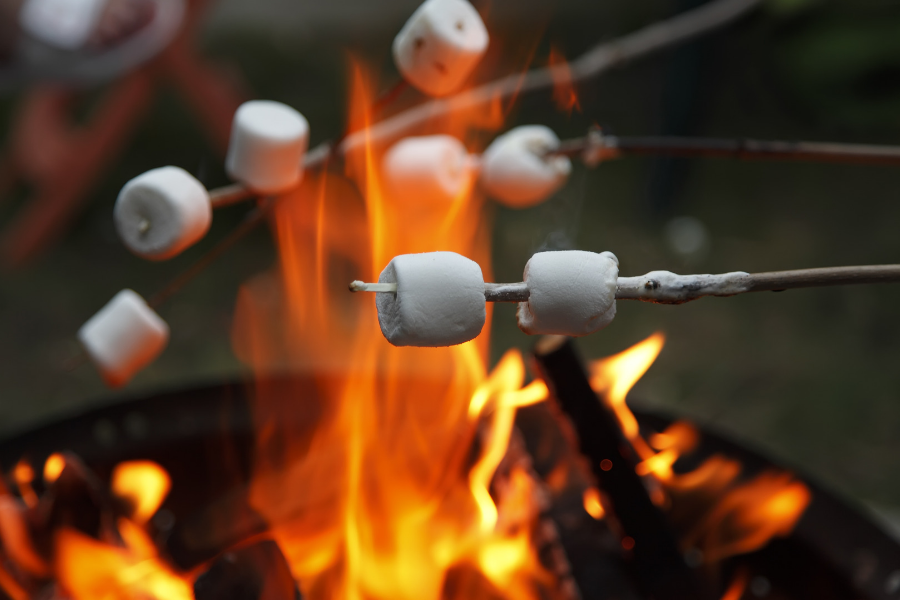
S’mores are a MUST for camping. To make them easier and cleaner to eat, I’ve come up with a more “adult” way of eating S’mores, while still making them as tasty as ever!
Ingredients:
- 1 marshmallow
- 2 tbsp chocolate chips
- ¼ cup cocoa pebbles
- ½ cup crushed up graham crackers (or golden graham cereal, cap’n crunch, etc.)
- Disposable cup
1: In a disposable cup add crushed graham crackers followed by a layer of cocoa pebbles and chocolate chips
2: Toast the marshmallow(s) over the fire using a roasting fork slowly. Make sure the center gets nice and hot, and completely melted through.
Put a marshmallow on top of the graham cracker and chocolate layers, giving it a minute to melt the chocolate and cool down.
3: Top with additional chocolate and enjoy!
9. Fresh orange cakes
⇨ Prep Time: 10 min
✓Cook Time: 20-30 min
⛉ Makes: 10-12 cakes
⛢ Method: Aluminum foil, open flame
△ Equipment: none
Orange cakes are a great dessert alternative if you want to avoid the traditional S’mores dessert.
Oranges are a great fruit to bring camping because they don’t require any refrigeration. They are also full of nutrients to give you an energy boost while camping, and kids love them.
Trying to bake on an open fire can be tricky, but the rind provides the cake with some protection from this.
It will also impart some tasty orange flavor to the cake while keeping it moist.
Ingredients:
- 10-12 oranges (obviously bigger oranges will use more batter)
- 1 box cake mix — I like yellow cake more here but chocolate would be delicious too
- Aluminum foil to prevent burning
1: Make cake batter following the box’s instructions.
2: Cut off the top 1/5th of the orange — just enough to see the insides and scoop out the yummy fruit part.
3: Pour cake batter into hollowed-out oranges about 3/4ths the way full. Use the top as a “lid” and place back on top. Wrap the entire orange in foil.
4: Place oranges near fire or bury underground with hot coals on top. Cook for 20-30 minutes (depending on the intensity of the fire).
Insert a toothpick into cake, if comes out dry with no wet batter, they are done!
5: Add leftover oranges as a topping and enjoy.
Tips for Being a Great Campfire Cook
Prepping meals and cooking while camping should be a fun and creative experience. But there are dangers that you need to watch out for while outdoors.
Remember, you’re in nature not in your own home, so be careful!
Here are some helpful tips for a safe but fun campfire cooking adventure.
Know the local laws
Before building a fire and setting up camp, make sure that the area you’re in is not in the middle of a burn ban.
Here in Colorado, the weather can be very dry and burn bans are in place often.
Also, check to make sure that the park or campground is approved for camping. Not all camping locations allow users to set up a tent or park an RV.
If you don’t know the local area, do some research before setting out on your camping trip. Always obey the local laws to keep you and others safe.
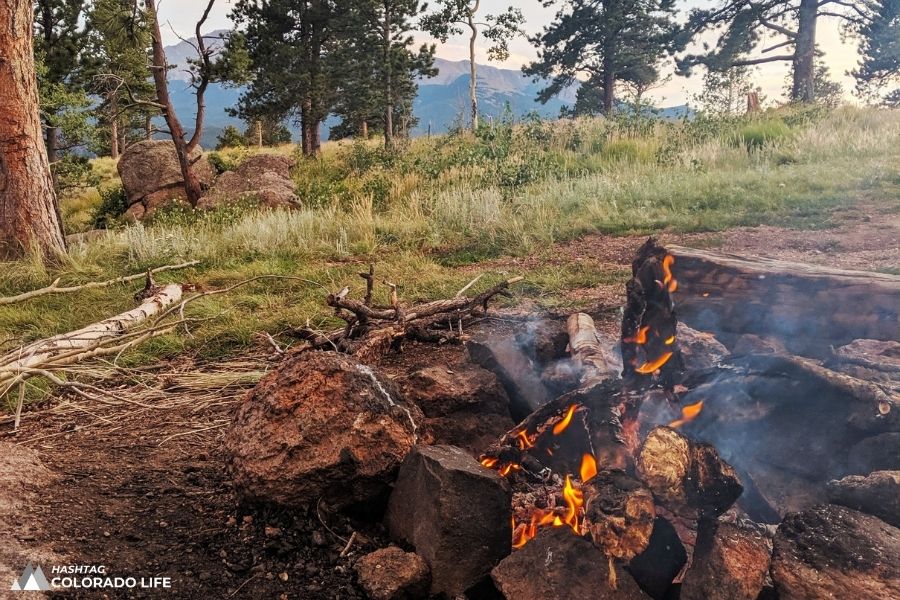
Build a good fire
Aim to set up your fire in a safe place that’s away from brush and other debris, especially low-hanging branches.
Dig a shallow fire pit and clear a 10 foot perimeter around it. The right fire for cooking needs to be hot and allow you to cook food right on the coals.
Choose dry branches and pieces of wood that will catch fire easily and burn hot.
Bring the right equipment
To make your campfire cooking experience as easy as possible, have the right equipment. Bringing pots or utensils from your household kitchen could be a disaster.
They could melt or incur long-term damage from the fire’s direct flames.
Opt for cast iron cookery and use metal, not plastic or rubber handles on your utensils and accessories.
Having the right equipment can also reduce your cooking and clean up time.
Whenever possible, bring a portable grill that runs off propane as a backup, in case you’re unable to make a good fire for cooking.
Use fire-resistant gloves
Fire-resistant leather gloves are going to be your best friend when cooking while camping. You can buy an inexpensive but high quality pair at your local home improvement store.
They can usually be found in the grilling or barbecuing section.
Your hands and arms will need to be protected from the hot flames while cooking, and a good set of leather gloves can do this.
Securely store food away from animals
A final important safety tip is to remember that you are outdoors, in the wild. There will be different kinds of animals and insects looking for food and smelling everything you’re cooking.
So, it’s important to securely store your food away at all times — even during the day.
This includes any leftovers as well as pots and utensils that you used to cook the food. Keep your campsite area clean and securely store away all food.
Now, go out there and enjoy your camping experience!